Fixing a micro PC or tiny PC behind an LCD using a VESA mount kit can be a convenient way to save space and keep your setup organized. Here's a step-by-step guide on how to do it:
Gather your materials: You'll need a VESA mount kit suitable for your LCD monitor and a compatible mounting bracket for your micro PC or tiny PC.
Prepare your workspace: Make sure you have enough space to work comfortably and that your LCD monitor is turned off and unplugged.
Attach the VESA mount to the LCD monitor: Follow the instructions provided with your VESA mount kit to securely attach the VESA mount plate to the back of your LCD monitor. Make sure to use the appropriate screws and any included spacers or adapters to ensure a snug fit.
Prepare the micro PC or tiny PC: Ensure that your micro PC or tiny PC is turned off and unplugged. If there are any existing mounting brackets or mounting points on the PC, remove them if necessary.
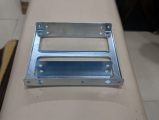
Attach the mounting bracket to the PC: Depending on the design of your micro PC or tiny PC, you may need to use a custom mounting bracket or adapter plate to attach it to the VESA mount. Follow the instructions provided with your VESA mount kit or any additional mounting hardware you may have purchased.
Position the PC behind the LCD monitor: Carefully position the micro PC or tiny PC behind the LCD monitor, aligning it with the VESA mount plate attached to the monitor.
Secure the PC to the VESA mount: Use the appropriate screws or mounting hardware to securely attach the micro PC or tiny PC to the VESA mount. Make sure the PC is positioned securely and does not wobble or shift.
Check for proper alignment and stability: Once the micro PC or tiny PC is securely attached to the VESA mount, double-check to ensure that everything is properly aligned and stable. Make any necessary adjustments to the mounting hardware as needed.
Connect cables: Finally, connect any necessary cables, such as power cables, video cables, and peripherals, to both the LCD monitor and the micro PC or tiny PC. Make sure all connections are secure.
Test the setup: Turn on your LCD monitor and micro PC or tiny PC to ensure everything is functioning correctly. Adjust the positioning of the PC behind the monitor if necessary.
By following these steps, you should be able to securely mount a micro PC or tiny PC behind an LCD monitor using a VESA mount kit, saving space and keeping your setup tidy.


